Instructions for Integrating Dazos CRM with Zapier
- To enable the Zapier integration, check the box next to “Enable Zapier”.
- Navigate to the Dazos CRM website and log in using your ID and password.
- Once you are logged in, you will be taken to the Dazos CRM dashboard. On the left-hand side, click on “Settings”.
- In the Settings menu, click on “CRM Settings”.
- From the right-sidebar, select “Integration”.
- In the Integration section, select “Zapier”.
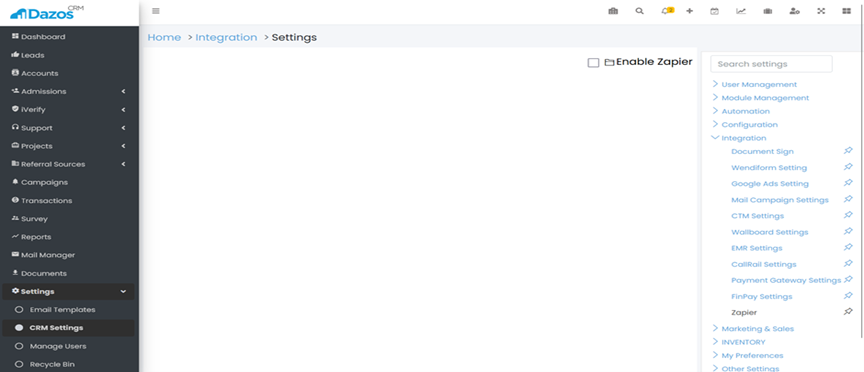
- Once you have enabled the integration, you will see your “Instance Name” and “Password” displayed. This information is required to log in to Zapier.

- Open a new tab in your web browser and go to https://zapier.com. Log in to your Zapier account.
- In the Zapier dashboard, click on “Create Zap” from the right-sidebar.
- Select the trigger or action you want to use by searching for it in the Trigger/Action search box.
- To find the Dazos triggers and actions, search for “Dazos”.
- In the “Instance Name” and “Password” fields, enter the instance name and password obtained in step 7. Make sure to enter the information correctly.
- Once you have entered your credentials, click “Continue”.
- Follow the prompts to set up your desired workflow.
With this setup, you will now be able to use Dazos CRM with Zapier to automate your desired workflows.